
Laptops are amazing because of their portability. You can throw your device in a case and bring it to work, school, or use it in the kitchen, living room, or just about anywhere else.
The benefit of portability proves to be your gaming laptop’s main pitfall though. We’ve found that sooner or later, problems will happen and you might be dealing with a broken laptop. Never fear – you can try these three laptop repairs on your own in the comfort of your own home.
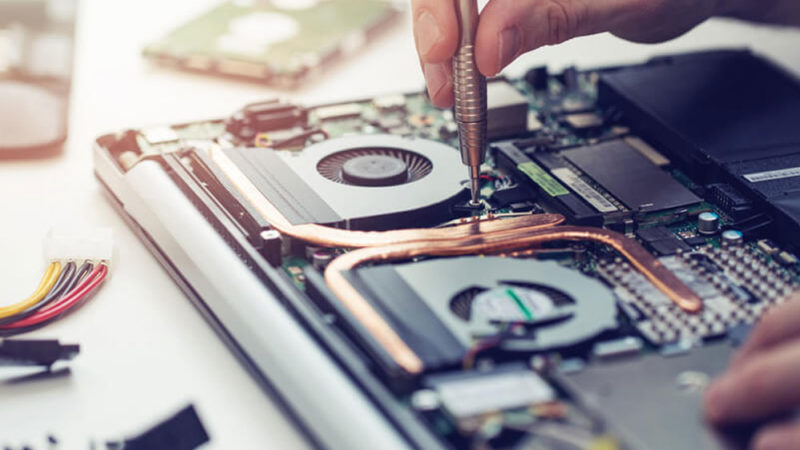
Fixing a Busted Laptop Fan
If your laptop cooling fan is being noisy or not performing at peak performance, you run the risk of overheating your laptop and damaging the parts inside. Luckily, this is a fairly straightforward repair, and you might not even need to do it at all.

Let us explain – sometimes cooling fans get clogged with dirt, gunk, or dust which makes them less efficient and noisier. Find out where the outside, cooler air is being sucked in and where the hot air is escaping. This will usually be on the side or bottom of your laptop. Use compressed air on each vent and get rid of all the dust and debris you can.
You might be surprised at how much dust is actually clogging up your laptop – in the worst cases we’ve seen, we’ve needed vacuum cleaners and dusk masks.
Power up the laptop again and see if your cooling fans are fixed. If they aren’t, you’re going to need to crack the laptop open. Use your laptop manual to figure out how your case opens and remember to hold on to the screws.
With your laptop open, remove the busted fan after you’ve blown away any additional debris. Again, you might luck out and not have to replace your cooling fan. Inspect it to see if there is anything getting in the way of the fan’s blades. But if your fan doesn’t spin or makes noises after you twirl it, it’s going to need to be replaced.
Find the appropriate replacement fan, which could cost from $5 – $20. (A little effort can save you a lot of labor money at a laptop repair shop).
When you’re sure you’ve got the proper fan, take out the old one by unscrewing the frame holding the fan in place, unplugging the power connector, and removing the screws that hold the fan to the frame.
Slip in the replacement fan and reassemble everything, screwing everything back into place. Remember to plug the power connector back in before you start up your laptop.
Fix a Sticky Key on Your Keyboard
It would be a shame to have to say goodbye to your favorite laptop because of a broken key.
While you might be able to nab an individual replacement key, a full keyboard typically costs just a little more and might be more of a steal if you have two keys missing or other keyboard issues.
Find the correct replacement keyboard for your laptop online or at the electronics store.
Every laptop is created differently. Some might have a bar above or below the keyboard to hold it in place. Others might have screws that need to be removed, or you might even need to open the whole laptop just to get to your keyboard. Trial and error are pointless when you can just take a look at your manual to find out how to remove your keyboard.
Although the repair instructions may vary depending on how you remove your keyboard, this is the gist:
Lift your keyboard, removing the ribbon cable connecting it to the motherboard before taking out the keyboard completely. After you’ve unplugged your keyboard, gently lift it out.
Plug your replacement keyboard in, slip it into place and screw it in.
Get Rid of Scratches on Your Display
If your display is shattered into pieces, it’s best to bring it to a professional to a repair. However, if you’re dealing with a superficial surface scratch, you can fix this on your own quite easily.
Grab some toothpaste – non-gel, abrasive kind and rub it between your fingers until it feels slightly gritty.
Carefully rub the toothpaste over the superficial dings and scratches for a few seconds in a circular motion. Next, wipe the screen with a soft cloth. To finish up, use a window cleaner that isn’t ammonia-based. You can get this at the local grocery store.
While this isn’t a failsafe solution (the toothpaste might just make minor scratches go away, leaving bigger dings and scratches to obstruct your view), it’s an easy one, so it’s worth giving it a shot.
When our laptops get hurt, it hurts a little on the inside too. When everything you use your laptop for – work, play, personal life, and more gets put into jeopardy by a broken laptop part, it’s easy to get stressed out.
Happily, these are three easy laptop repairs you can tackle on your own that take minimal time and effort and can save you a lot of money and time in the long run by allowing you to skip a trip to the repair shop.